Kids first aid Kids first aid

Kids First Aid

With a little one running around and busily exploring the new world around them, you must be prepared to treat a child for loss of consciousness, or to perform CPR, or deal with any one of the following everyday situations. Since you cannot avoid all emergencies while they are growing up, our advice is to familiarise yourself with resuscitation techniques or to complete a first aid course, if you can.  

Injury & Possible Symptoms

First Aid / Treatment & Actions

Bleeding: Minor cuts, scratches and grazes


  • Wash and dry your own hands.

  • Cover any cuts on your own hands and put on disposable gloves.

  • Clean the cut, if dirty, under running water. Pat dry with a sterile dressing or clean lint-free material. If possible, raise affected area above the heart.

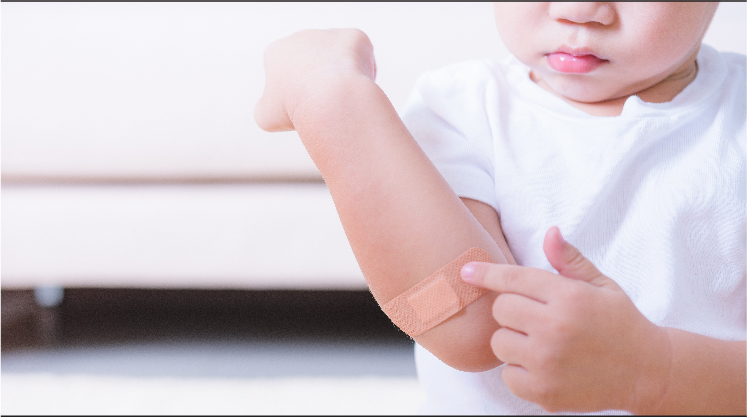
  • Cover the cut temporarily while you clean the surrounding skin with soap and water and pat the surrounding skin dry. Cover the cut completely with a sterile dressing or plaster.

  • If bleeding does not stop, treat for shock and call an ambulance for help.

Bleeding: Severe bleeding

Step 1/6: Direct pressure

  • Protect yourself from infection by wearing disposable gloves and covering any wounds on your hands.

  • Apply direct pressure to the wound with a pad (e.g. a clean cloth) or fingers until a sterile dressing is available.

Step 2/6: Elevate

  • Raise and support the injured limb. Take particular care if you suspect a bone has been broken.

Step 3/6: Lay the child down and treat for shock Step 4/6: Call for Help

 Step 5/6: Apply sterile dressing

  • Bandage the pad or dressing firmly to control bleeding, but not so tightly that it stops the circulation to fingers or toes.

  • If blood comes through the dressing do not remove it – bandage another over the original.

  • If blood seeps through both dressings, remove them both and replace with a fresh dressing, applying pressure over the site of bleeding.

 Step 6/6: Treat for shock

  • Keep on treating child for shock while you wait for the ambulance.

Objects in wounds

Where possible, swab or wash small objects out of the wound with clean water.


If there is a large object embedded:

  • Leave it in place.

  • Apply pressure on either side of the object.

  • Raise and support the wounded limb or part.

  • Gently cover the wound and object with a sterile dressing.

  • Build up padding around the object until the padding is higher than the object, then bandage over the object without pressing on it.

  • Arrange to take or send the casualty to hospital.

Burns and Scalds

Note: DO NOT remove any clothing or material that may be sticking to the burned area.

  • If no cold water is available, use another cool liquid such as milk.

  • Cool burn with cold water (preferably running water) for at least 20 minutes.

  • Remove cooled clothing and cool injury again. Cut around material that is sticking to the burn.

  • Do not touch the burn or burst any blisters.

  • Cover burn loosely with clean non-fluffy material, plastic bag or kitchen film.

  • DO NOT give anything to eat or drink and watch for signs of shock.

  • Seek medical attention by calling one of the

Choking

* Breathing is obstructed * Sudden clutching at the throat * Face may turn blue * Trying to cry or speak, but making strange noises or no sounds

A Choking Baby

DO NOT shake a baby or hold them upside down!

  • Lay the baby face down with its head low and chin supported by your hand.

  • Give 5 sharp blows between the shoulder blades. If this does not clear the blockage give up to 5 chest thrusts.

Chest Thrust for a baby:

  • Place baby on its back on a firm surface.

  • Place two fingers in the CPR compression position.

  • Give 5 chest thrusts, sharper but slower than CPR.

  • Check in the mouth for the obstruction.

  • Call an ambulance if obstruction has not been cleared.

  • Repeat steps until help arrives or the obstruction is cleared.

  • Monitor breathing and pulse and be prepared to resuscitate.

A Choking Child

  • Encourage the child to try to cough up the object if possible.

  • Bend child forward and give 5 sharp slaps between the shoulder blades.

  • If back blows fail, commence chest thrusts, checking to see airway is clear after each thrust.

Chest thrusts for an older child:

  • These can be given either standing, lying or sitting.

  • Identify the same point on the sternum as when doing CPR.

  • Place one hand on the back for support and one hand on the sternum if child is upright.

  • Thrusts should be sharp and delivered at a slower pace than compressions.

  • Look in the mouth for the obstruction after each thrust.

  • Call an ambulance if the obstruction has not cleared.

  • Repeat steps until help arrives or the obstruction is cleared.

  • Monitor breathing and pulse and be prepared to resuscitate.


Febrile Convulsion / Seizures

  • The child may be flushed and sweating with a hot forehead

  • The eyes may roll upwards, be fixed or squinting

  • Face may look blue if they are holding their breath

  • The back may be arched and stiff

  • Fists may be clenched.

Baby or Toddler

  • Place the child on their side on the floor or large flat area for safety (to keep their airways open, to prevent injury, and so they don’t swallow any vomit).

  • Remove objects nearby that may cause injury.

  • After the convulsion has stopped, remove excessive clothing to assist with cooling. DO NOT attempt to cool by sponging or bathing.

  • If the seizure lasts for more than five minutes call an ambulance.


Snake and Spider Bites

  • A pair of puncture marks

  • Severe pain, redness and swelling around the bite

  • Vomiting

  • Disturbed vision and increased salivation and sweating

  • Breathing difficulties

Snakebites are relatively uncommon in South Africa. However, we have many poisonous species to look out for: adders, cobras, mambas and the boomslang. The type of poison and the effects on the person bitten depend on the species of snake, and the size and general health of the person. A few basic steps in terms of snakebite first aid are always advocated:

  • Keep the patient still, calm and quiet in order to prevent the spread of venom

  • Wash the bite wound with soap and water (do not cut into, or suck on the bite in an effort to ‘drain’ the venom – this is not like in the movies)

  • If the snake has spat venom into the eyes, keep on rinsing them out with clean water for at least 15 minutes

  • Immobilise the bitten area and keep it lower than the heart (do not apply any form of tourniquet – once again, we are not in the movies)

  • Do not administer any type of pain relief medication (unless otherwise instructed by a qualified medical practitioner), especially not aspirin, as this thins the blood

  • Do not allow the patient to eat or drink anything, especially not alcohol-containing products

  • Only administer anti-venom under the direction of qualified medical help – it can do more harm than good if used under the wrong circumstances; anti-venom is not usually needed unless the child is under the age of two, or they are a long way from hospital

  • Get medical help as soon as possible!

  • Call your provincial / regional Poison Information Centre

  • Follow their advice

Spider bites:

Severe spider bite symptoms occur as a result of injected spider venom. The severity of symptoms depends on the type of spider, the amount of venom injected and how sensitive your body is to the venom. Although dangerous spider bites are rare, your risk of being bitten increases if you live in the same areas that the spiders do and you happen to disturb their habitat. Both black widows and brown recluse spiders prefer warm climates and dark, dry places.

Seek prompt medical assistance if you believe you/ your child has been bitten by a spider and are experiencing the following symptoms:

  • Severe pain

  • Abdominal cramping

  • A growing ulcer at the bite site


When you call an ambulance, state clearly:

  • The site of the emergency (include names of cross streets, if possible)

  • What happened to the victim and the victim’s condition

  • The number of the people injured

  • The age of the victim

  • Your name and contact telephone number

  • Any first aid currently being given

Do not hang up until the operator tells you to. This way you'll be sure that you have given all the necessary information.

What to have in your first aid kit at home:

Every household should have a well-stocked first aid kit. Keep one in your home and one in your car. Store the kit in an accessible place, but out of reach of small children. You can purchase one from organisations such as St John's ambulance or buy the items separately from a pharmacy. Make sure that you know how to use the items and what they are for. Every time you’ve used the kit, make sure you replace any used items promptly. Otherwise, make a point of checking your first-aid kit regularly, at least every three months, to be sure the flashlight batteries work and to replace supplies that have expired.

What should a home first aid kit contain?

There are several kits available, each with slightly different contents and quantities. However, most good home first aid kits will contain the following items:

  • Disposable latex or synthetic gloves, at least two pairs

  • 1 roll medical adhesive tape (1 m x 2,5 cm)

  • 3 x roller bandages (50 mm)  and 3 x roller bandages (75 mm)

  • 2 x triangular bandages

  • Gauze dressing

  • 2 x small wound dressings, 2 x medium wound dressings and 2 x large wound dressings

  • Roll of cottonwool for padding

  • 1 pair of bandage scissors

  • Safety pins in assorted sizes

  • 1 eyebath

  • Tweezers or forceps

  • 1 x burn dressing e.g. Burnshield

  • 1 tube antiseptic ointment

  • 1 pair disposable gloves

  • 1 mouthpiece for administering CPR

  • 1 packet assorted plasters

  • Calamine lotion for soothing skin irritations, sunburn and stings

  • Aspirin and non-aspirin pain relievers (never give aspirin to children)

  • Over-the-counter oral antihistamine

  • Anti-diarrhoea medication

  • Sterile eyewash, such as a saline solution

  • Thermometer

  • Rehydration fluid such as Rehidrat

  • Measuring spoons

  • Sunscreen

Other emergency items

  • Emergency phone numbers, contact information for your family doctor and pediatrician, name of medical aid and membership number. (TIP: type it out and place page in an A4 plastic sleeve then sticky tape it to the inside of the lid so that you can see it when you open it)

  • Small, waterproof flashlight and extra batteries

  • Candles and matches

  • Emergency space blanket

  • First-aid instruction manual

EmptyView